12.30.2008

Hooray!

We are about 99.99% done. Except for a few tweaks here and there, we are finally finished!

We are tired, but it was worth it. The space is much more bright and happy- something lacking during Wisconsin winters......more function, more space, and didn't cost us an arm and a leg.

Here are some pictures.

Photobucket
Photobucket
Photobucket
Photobucket
Photobucket

Photobucket
Photobucket


Photobucket
Photobucket
Photobucket
Photobucket
Photobucket

The tile is going in!

Wow, what a huge difference. It barely looks like my kitchen. I'm so glad that we hired professionals to install it, it is tricky due to it's thickness and glaze. Here are a few pictures before tile, before grout, during grout and after grout. I'll post more of the 99% finished kitchen later. All that's left to do is add a bit more white trim on the back of the island, and detail the crown moulding with the brown paint. But, it's finished enough!!

Photobucket
Photobucket
Photobucket
Photobucket

12.21.2008

Darn, the Tile instal has to wait.

We were so excited that the tile installer said that he could squeeze us in and get the backsplash tile installed before Christmas. He showed up Saturday, thinking it would be a straightforward, quick job. Well, this handmade tile is thick and has a fussy glaze on the top and he needed some different equipment to cut it. Unfortunately that equipment is being used on another job and so we have to wait a week or so.

The crackle glaze just chips off so easily- hopefully it will be sturdy enough in the kitchen!

The tile is by Jeffrey Court, a hand made ceramic tile. It is their Irish Ice line, the color Donegal. It was a bit more yellow in the showroom, but I think this slightly taupier color will work just fine!

Photobucket
Photobucket

12.08.2008

All of the doors and drawers are painted!

Wow- that took SOOOOO much longer than I thought it would. I guess if I painted every day without fail, and didn't feed my kids, and never left the house, etc. I could have finished it sooner, but life happens.

The accent painting took a very long time- I wish we would have found a way that worked better, but we didn't. It looks great, but wow, what a job. Luckily Dave has a steady hand or else it could not have happened.

We still have some left to do. The tile for the backsplash has been delayed. It is handmade, and according to the company, they were having trouble getting the color just right. Not sure if I should be worried or not. Still have to do the trim around the base of the cabinets, and the trim on the bottom of the upper cabinets (light rail moulding). But, that should be simple. Just crossing our fingers that the tile will be here before Christmas, but in the whole scheme of things in life, a tile backsplash is not too urgent.

The funny thing is that even though we added some cabinetry here and there, the kitchen feels bigger. Love that! I am glad that Dave was on board with me, or this would have been an incredibly painful process.

I will post more pictures when it is DONE. Hopefully that will be in a few weeks, but if not, we will survive.

11.23.2008

The bar/half-wall looks great!

We are very pleased with how the bar turned out, so much better than that spindle rail.

Still painting a bit, tarps are everywhere, but we are making the best of it.


Photobucket
Photobucket
Photobucket

11.01.2008

A small change to our accent glazing technique

We found that our accent glazing was a bit too rustic looking, so we found a way to make a straighter line, although it is a bit darker and thicker, it seems to work in our kitchen. What we do is fill an empty glue bottle with a 4:1 ratio of glaze to brown paint, and squirt it into the crevices, then with our finger, remove the excess. With the taping, it works great and we are both very happy with the results. Like I said, it helps make the off white work in our house.

We still have a way to go, lots of trim and still many more doors to do, but we are starting to see the light at the end of the tunnel.

I have to add that the flow of the kitchen was not at all compromised by moving the island around a little. Linda and Kari were right- again!

Photobucket
Photobucket
Photobucket

10.24.2008

The Cambria Countertops are in

They arrived much faster than we thought they would- and they look great! At first, it was such a shock and difference from what we originally had that I wasn't sure what to think, but they do look pretty darn good! The color is a warm brown with flecks of lighter and darker quartz, called Reading.

We promised our designer we would re-stain the wood desktop in a darker color. So far she has been completely right with her advice, so we will get out the safer stripper and start again!

Photobucket
Photobucket

10.21.2008

All of the frames are painted, now a lot of doors....

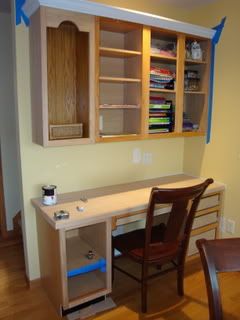
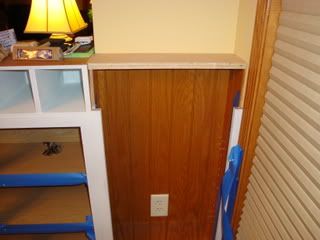
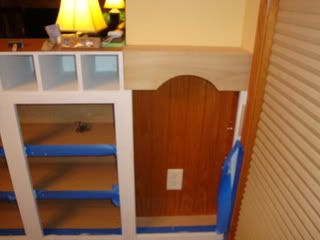
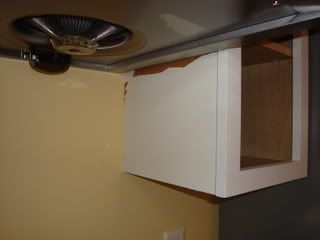
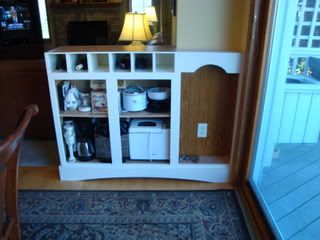
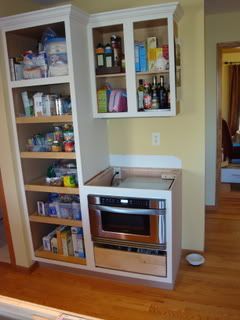
This painting is taking us longer than we thought. So far, all of the framing is painted, and all of the crown moulding. The only problems we had were a few places where we were not going to put decorative panels on the sides (like the insides of the desk cabinets where the chair might rub against, and the sides near the exhaust fan - see the picture). Those sides of the cabinets are not really wood, but some sort of laminate or wallpaper or something. Even with sanding, my latex primer did not stick to it and the primer and paint is peeling. Another spot where we used a oil primer, it stuck.

So, Dave bought luan and made panels where the paint did not take.

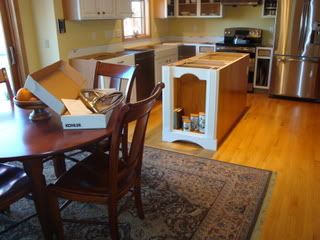
I am waiting for the countertops to arrive! I am a little nervous, but am pretty sure we will love them.

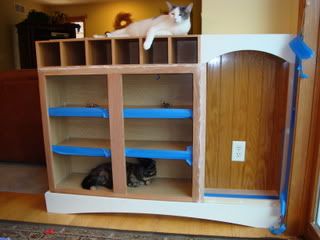
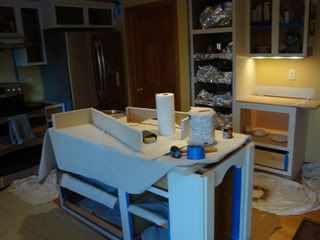
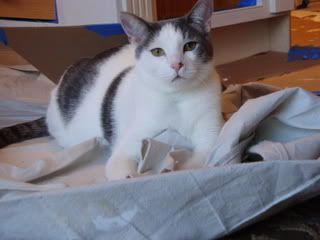
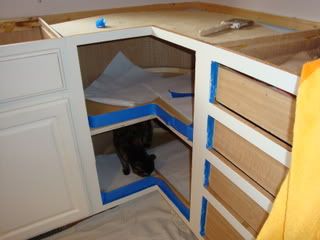
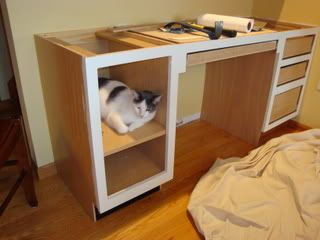
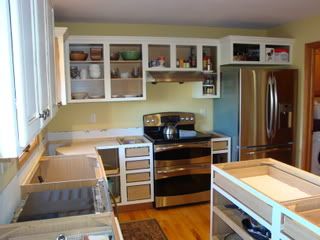
Here are some picture of this work in progress, including pictures of my assistants (the two cats). They help a lot!

By the way, I have to add that this project is taking a lot of time, but so far we have to say that it is totally worth it.

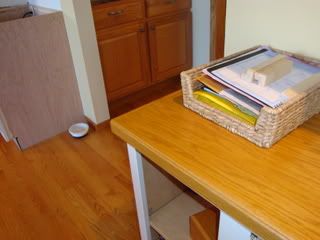
We are considering making one change (Linda, if you are reading this, I hope you understand!). For some reason, the desk top that we were finishing in a matching oak to the rest of the oak in the house did not take the stain like the oak beadboard and other oak accents we were putting into the kitchen. It really does not work well with the other oak elements in the kitchen and the house. One friend called it baby-poop color, and Dave compared it to the color of Dysentery. What we will probably do is put that desktop in the basement hobby room, and get a matching Cambria counter for the desk. No biggie- I'm sure our kitchen planner Kari will chuckle (or pull her hair out- this is the second desktop she ordered as the first one was harmed in shipping).

Photobucket
Photobucket
Photobucket
Photobucket
Photobucket
Photobucket
Photobucket
Photobucket
Photobucket
Photobucket
Photobucket
Photobucket
Photobucket
Photobucket

10.01.2008

So Glad we Hired a Carpenter and Electrician

Wow- what a big and messy job. We are so glad that we hired a carpenter to help out and an electrician to add some extra lighting and move some outlets. They are working very hard, and I imagine 2 days worth of their work would take us a month or so. The kitchen looks like a disaster area- it's kinda funny. There is a lot of dust from cutting into drywall and repairing some flooring where the island was moved and an electric line needed to be moved. They are sweeping up after themselves, though- they are all very professional.

Photobucket
Photobucket
Photobucket
Photobucket

The Ugly Spindle Rail is GONE!

Yes, I know everyone hates it, we do too. Ever since we saw the house the first time, we could not wait to get rid of the railing between the living room and kitchen. It took about an hour to get it off, it was secured very well (why, I don't know). The whole family got involved.

We also removed the sink so that the counters could be removed today. The electrician and the builders (experts at kitchen cabinets) are here today adding lights, moving lights, moving outlets, moving cabinets, and adding on a few things here and there. One thing I am so excited about is changing around the lazy susan to make it more functional and not a finger pincher.

They are all doing an excellent job and we are so glad we hired some experts to help out for a few days.

Photobucket
Photobucket
Photobucket
Photobucket
Photobucket

9.27.2008

Dust

I am learning that adequate dust removal is absolutely necessary for a nice finish. And that it is very difficult to get all the dust from sanding off of the items. I thought vacuuming and a wiping with a tack cloth would be enough, but it really is not.

I am using ZAR quick drying oil polyurethane in a satin finish. The polyurethane over the stain on the beadboard really looks terrible if there is stain residue or sanding dust around. What I found was necessary is to vacuum, tack cloth, then go over everything again with a cloth dampened with mineral spirits. What a huge difference it makes. Also, I found sanding with 400 grit gator wet/dry sandpaper between coats of poly works very well- it knocks down imperfections without scratching or removing too much and adding to even more dust issues. Just have to be super careful to remove every speck of dust.

Also for cleaning up the sanding dust from painting, a water dampened cloth really helps. The smallest bit of dust just gets huge when paint or poly goes over it. Drives me crazy, but now that I figured out how super careful I need to be, I can deal with it.

9.23.2008

Adding Glaze Accents to the Doors

We found a color of an accent glaze that warmed up the painted doors and hoped to blend them into the existing oak and countertops that we are planning on installing. It is Valley Forge Brown from Benjamin Moore and we mixed it 1 parts paint to 5 parts latex glaze. The hard part was getting a straight bead of the the glaze in the crevices. It was looking very sloppy and we were very unhappy with it, until Dave thought of a solution! We taped with Delicate Surface 3M tape where we did not want the glaze to go, and with our fingers applied the glaze, then removed just enough to lighten it and removed it in between two crevices where we did not want it antiqued but could not fit the tape. First we removed it with our fingers, then with a dry painters rag then a wet one.

We are absolutely thrilled with the way it turned out! At first, I was just concentrating on how imperfect the process was, but then I turned away to do something else for a few minutes and came back to see the doors hung and I got a tear in my eye- I was so happy, and mostly very relieved that we are on the right track. Not that I doubted our ideas or Linda's advice, but until I could really see it in the house, I had a hard time visualizing it in our house.

The picture below shows one door with the glaze accents and one without. In our house, the one with the glaze is the winner!

Photobucket
Photobucket