Kinda boring stuff going on.
Cleaning out cabinets, buying painting materials, meeting with a handyman for a bit of help with installation (he is SO NICE!), painting the adjacent laundry room, etc......
And, going shopping to buy a new camera that works. My old one finally died, but wow, did that Sony Cybershot ever put in a lot of duty over the years. Hopefully my blog pictures will be better.
8.26.2008
8.17.2008
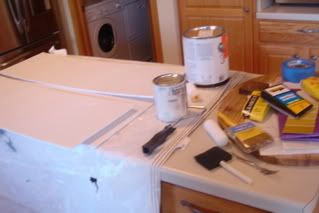
Choosing Paint Colors and Techniques
This is one of the hard parts...deciding on a creamy off-white that is not too pink, yellow, blue, grey or brown. Once again I have to say "Thanks!" to Linda our neighbor, friend, dinner club colleague and interior designer for helping us narrow down the choices.
I had two paint chips in my hand when I went to my Mautz store (which carries Sherwin Williams paint) and walked out with one can of cabinet paint (the lighter color could not be made in the Pro Classic Satin Enamel---a highly regarded paint for kitchen cabinets).
So, Casa Blanca was tested on practice boards with different techniques. Thanks to the iVillage Paint forumPaint Web I have the technique down. Almost. Still deciding whether to sand or use liquid sander. But after that, primer applied with a roller, then back brushed at an almost parallel angle. Dry. Sand with 320 grit sanding sponge. The apply 2 coats of the Pro Classic- both with a roller, then back brushed with a Corona Cortez brush (yes, I tested a few). Sand in between the first and second coat. Beautiful!
PS The wall color we picked is SW Humble Gold. Yummy combination.
I had two paint chips in my hand when I went to my Mautz store (which carries Sherwin Williams paint) and walked out with one can of cabinet paint (the lighter color could not be made in the Pro Classic Satin Enamel---a highly regarded paint for kitchen cabinets).
So, Casa Blanca was tested on practice boards with different techniques. Thanks to the iVillage Paint forum
PS The wall color we picked is SW Humble Gold. Yummy combination.


8.12.2008
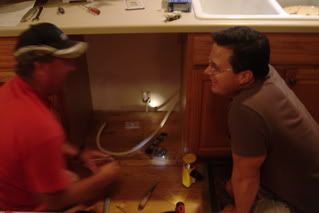
Installing a Dishwasher, or..."Thank Goodness We Live Next Door to an Electrician"
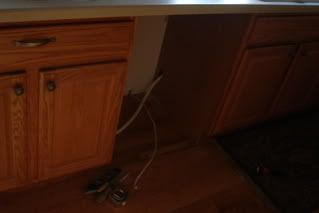
So, the delivery of the appliances went well, but on Friday night when we decided to install the ASKO dishwasher we ran into a small problem. The old dishwasher was hard wired, and the new one had a plug.
Not exactly sure the best and safest way to address this we called Dale- our friend and next-door neighbor, who also happens to be an electrician. He installed an outlet where the wire was, instead of plugging the dishwasher into the same under-the-sink outlet as the disposal.
Then came the plumbing aspect of the project, which went pretty smoothly, even after having a few cocktails.
We LOVE this dishwasher! I cannot believe how well it cleans, even without rinsing (per the manufacturers instructions). All of our dishes fit very well (I brought a bunch into the store to test the various models to make sure they would). We made a good choice.


8.08.2008
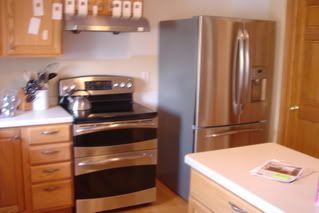
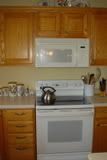
Next Step- New Appliances
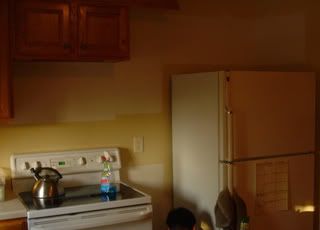
While we are waiting for the extra cabinets to arrive, we went ahead and ordered our appliances. They are coming in the next few days and we cannot wait! The Sharp Drawer Microwave cannot be installed until the microwave cabinet arrives in 3-4 weeks, but the range (GE profile double oven with convection), the dishwasher (ASKO), the fridge (GE profile French door with water dispenser on the door) will all be in. Our old refrig, OTR microwave, and dishwasher will be scrapped, and the range which is still in great shape but will not match the new appliances is being donated to Habitat for Humanity. They didn't want the dishwasher as they are just not made well and used ones can be problematic. The fridge uses so much electricity plus does not work well so it will be scrapped- the Sierra Club even recommends discarding old beasts of refrigerators instead of finding new homes for them as they waste so much electricity.
8.07.2008
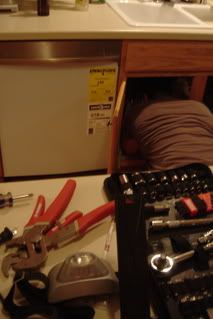
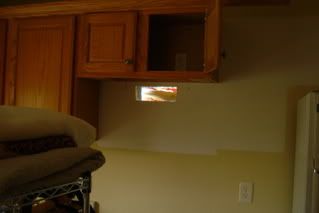
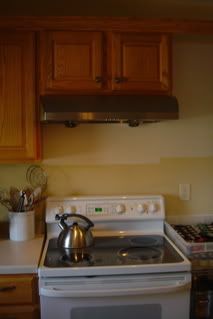
Installing a Kobe Rangehood
Wow- I can't believe how much better the kitchen looks without the microwave being the focal point, Now, it is time to install a beautiful, super powerful rangehood by Kobe. I learned about the brand on iVillage's website the Kitchen forum under Garden web Kitchen Web Great Website!! I never would have thought to look at that brand, or online for that matter. Even my local appliance guy thought the Kobe was an outstanding value and product.
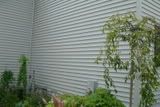
It was not easy to install, just due to the weight of the thing. Plus, my husband had to cut a hole in the side of the house to vent the thing to the outside (our current microwave vent system was recirculating, so that my house always smelled like what I was cooking for hours and hours). We opted to vent straight back which allowed a short path with no bends (which is supposedly quieter).
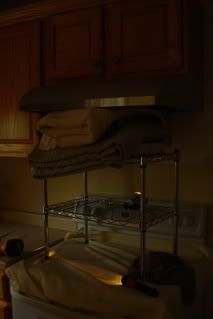
The hardest part was figuring out how to hold the thing to the underside of the cabinets while screws were being attached to hold it in place. We finally came up with a combination of a wire shelf, plus books plus blankets to hold it in place so that it did not need to be held in place by either one of us. It was HEAVY!
The only problem that happened was that the glass cover to the halogen light shattered after being on for a few minutes- luckily we went through a good vendor (ventingdirect.com) and they were super helpful, and Kobe called us directly and the part is on its way. Their customer service is awesome!
The system works very well- we are pleased.

It was not easy to install, just due to the weight of the thing. Plus, my husband had to cut a hole in the side of the house to vent the thing to the outside (our current microwave vent system was recirculating, so that my house always smelled like what I was cooking for hours and hours). We opted to vent straight back which allowed a short path with no bends (which is supposedly quieter).
The hardest part was figuring out how to hold the thing to the underside of the cabinets while screws were being attached to hold it in place. We finally came up with a combination of a wire shelf, plus books plus blankets to hold it in place so that it did not need to be held in place by either one of us. It was HEAVY!
The only problem that happened was that the glass cover to the halogen light shattered after being on for a few minutes- luckily we went through a good vendor (ventingdirect.com) and they were super helpful, and Kobe called us directly and the part is on its way. Their customer service is awesome!
The system works very well- we are pleased.


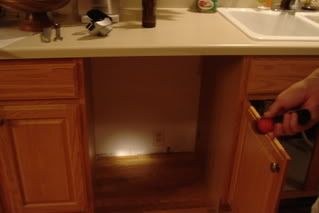
Removing Cabinets and Microwave - Step 1
Today we removed cabinets and OTR microwave so that the larger fridge will fit. It went better than expected, and the wood floor under the base cabinet was in great shape and gives us hope that it will be good under the island (which will be moved and therefore visible). We were able to use one of the base cabinets in the laundry room, the others will be donated to Habitat for Humanity.

8.03.2008
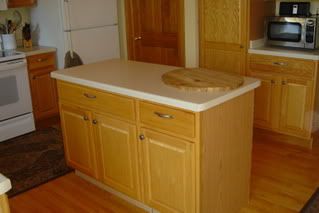
Summer, 2008 - We Finally Have a Plan
After a year of researching kitchen makeovers, we have decided that painting the existing cabinets and adding a few more to the present layout is the perfect solution. This idea of a "face-lift" is more economical, it does not waste the existing cabinets, and it will be less disruptive to our family. I have to thank a fellow ebayer for posting some pictures of her kitchen on a discussion board. Thanks mvpp5! her ebay page
It really convinced me that we were making a great decision. I say that now....wait until we are in the middle of the project and I might change my mind.
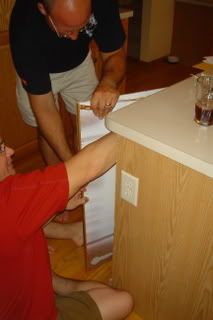
One reason we are able to do this is because we have wood floor under the existing cabinets - which means we can move some things around to make room for a bigger island, etc without having to redo flooring. Thanks Mark for helping take apart the island! It was hard work figuring out whether or not there was oak under there.
It really convinced me that we were making a great decision. I say that now....wait until we are in the middle of the project and I might change my mind.
One reason we are able to do this is because we have wood floor under the existing cabinets - which means we can move some things around to make room for a bigger island, etc without having to redo flooring. Thanks Mark for helping take apart the island! It was hard work figuring out whether or not there was oak under there.

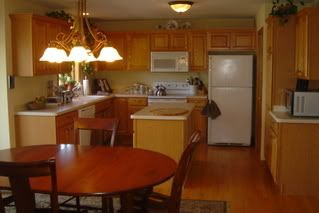
Summer, 2007 BEFORE PICTURES
It all began with a meeting with my neighbor who is a fantastic interior designer. I wanted her opinion on a few things, and we got to talking about my kitchen. It's not a bad kitchen- the cabinets are sound, the oak floor is fantastic, and it is fairly large.
However, we really wanted to lighten up the north-facing room and see a little less oak. Plus, our refrigerator is pretty puny and about to die. We wanted a bigger space for a large french door model and a better ventilation system. Our present one is an OTR microwave that recirculates- does not even vent outside. Oh yeah, the microwave doesn't work anymore.
She mentioned giving the kitchen a "face-lift", meaning change out the countertops, add a few more cabinets here and there, a nice backsplash, etc. When I mentioned that I would need new cabinetry because I want off-white painted ones, she mentioned painting our existing cabinets as a very good option. We had a lot of thinking to do.


Subscribe to:
Posts (Atom)