I am learning that adequate dust removal is absolutely necessary for a nice finish. And that it is very difficult to get all the dust from sanding off of the items. I thought vacuuming and a wiping with a tack cloth would be enough, but it really is not.
I am using ZAR quick drying oil polyurethane in a satin finish. The polyurethane over the stain on the beadboard really looks terrible if there is stain residue or sanding dust around. What I found was necessary is to vacuum, tack cloth, then go over everything again with a cloth dampened with mineral spirits. What a huge difference it makes. Also, I found sanding with 400 grit gator wet/dry sandpaper between coats of poly works very well- it knocks down imperfections without scratching or removing too much and adding to even more dust issues. Just have to be super careful to remove every speck of dust.
Also for cleaning up the sanding dust from painting, a water dampened cloth really helps. The smallest bit of dust just gets huge when paint or poly goes over it. Drives me crazy, but now that I figured out how super careful I need to be, I can deal with it.
9.27.2008
9.23.2008
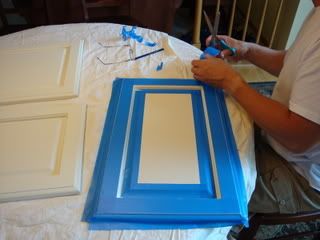
Adding Glaze Accents to the Doors
We found a color of an accent glaze that warmed up the painted doors and hoped to blend them into the existing oak and countertops that we are planning on installing. It is Valley Forge Brown from Benjamin Moore and we mixed it 1 parts paint to 5 parts latex glaze. The hard part was getting a straight bead of the the glaze in the crevices. It was looking very sloppy and we were very unhappy with it, until Dave thought of a solution! We taped with Delicate Surface 3M tape where we did not want the glaze to go, and with our fingers applied the glaze, then removed just enough to lighten it and removed it in between two crevices where we did not want it antiqued but could not fit the tape. First we removed it with our fingers, then with a dry painters rag then a wet one.
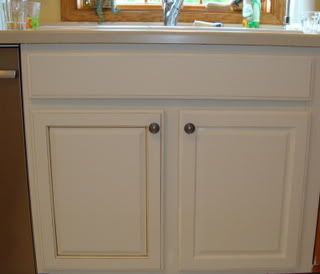
We are absolutely thrilled with the way it turned out! At first, I was just concentrating on how imperfect the process was, but then I turned away to do something else for a few minutes and came back to see the doors hung and I got a tear in my eye- I was so happy, and mostly very relieved that we are on the right track. Not that I doubted our ideas or Linda's advice, but until I could really see it in the house, I had a hard time visualizing it in our house.
The picture below shows one door with the glaze accents and one without. In our house, the one with the glaze is the winner!

9.20.2008
A very slight change of plans
All I can say is that I'm glad that we are painting our cabinets, instead of just ordering more to fill in a few blanks. Here is the reason. Even though the cabinets are just 7 years old, their color has changed dramatically compared to the new cabinets with the same exact finish color. Ours currently are orangish-yellowish, and the new ones have a pinkish brown tone. They really do not work together, and the new cabinets really clash with the existing wood floor. Plus, we picked the paint color with the oak tone in mind- colors really play off of each other in tricky ways.
So, we felt it was most important to match the stain color to what we have now rather than match it to the new color. Remember, we are staining some portions of the new items to help blend the oak and the painted cabinets together. There was one unit going in as a half-wall/wine rack area between the kitchen and living room and it was to stay oak. Now it will be painted (more work for me!). It should still be nice.
The reason that area was pre-stained was that the line of cabinets that match our existing doors exactly only comes pre-stained (Merillat Classic line) whereas the higher end Masterpiece line (some of the new units are from this line) can be sent unfinished.
In the end it might be even nicer to have that unit painted, I guess we will never know though for sure. No biggie- if that is the biggest glitch we run into we are pretty darn lucky!
9.17.2008
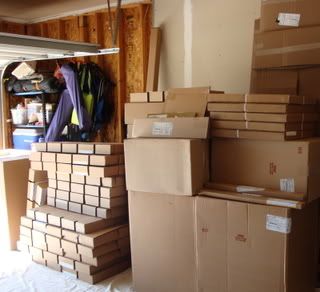
Tha cabinets arrived today!
And all I can say is thank goodness we are hiring a cabinet installer to help out with it. There are so many different parts and pieces sitting our garage.
I was hoping to stain the backs of the open shelves, the beadboard back of the island, and the desktop before they were all installed (they were ordered without stain so we could match the color to what our cabinets look like now), but now I realize that just finding them in the pile of boxes will be challenge enough. I guess they will be finished after they are installed. It will be a bit trickier, but I think the only way it's going to realistically happen.
I know in the end it will all be worth it, but right now it seems like an unending process. I think once Don comes and installs the extra cabinets I will feel a little more at ease.

9.13.2008
Today was not a good day
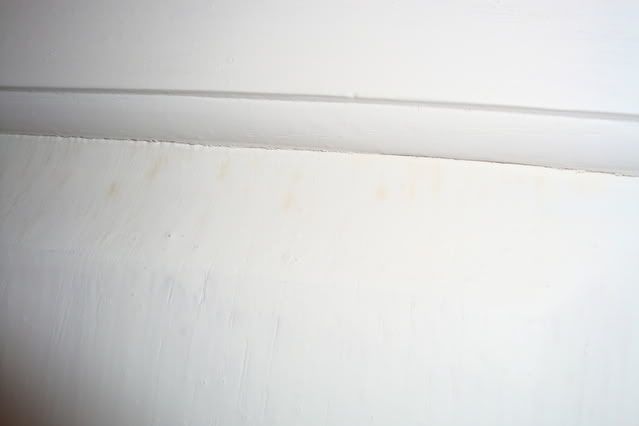
Today was annoying. I realized that I cannot use the deglosser and wait 3 hours before priming. It must have done such a good job deglossing that the tannins from the oak bled through my lovely latex primer (it's a bonding primer). You can see some of the freckles in the picture, and the fellow at the paint store assured me that those stains would bleed through the enamel, too. So, after 2 coats of bonding primer, I got to sand and paint on an oil based primer - Zinnser Stain Block I think it's called.
I was not happy with the way it went on- it's a fast drying one, and it left lots of brush marks. Even with a good brush. Can't wait to sand those doors again.
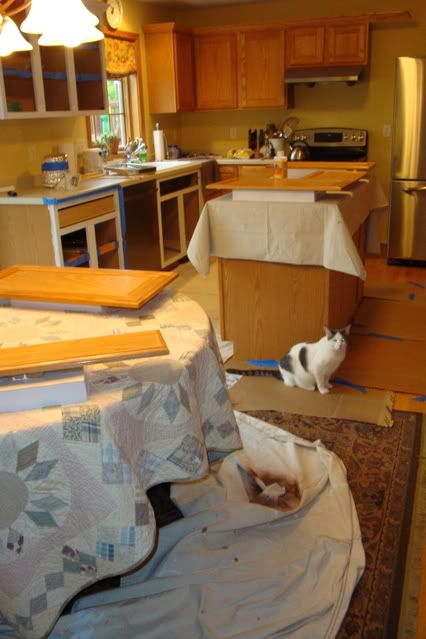
The kitchen is a mess- hardly usuable. Tonight it's left over lasagna I found in the freezer. Tomorrow when mom and dad arrive for a visit it will be take out pizza in the basement. And my cats seem to love paint. At least they have not gotten into the oil based primer (yet).
I was not happy with the way it went on- it's a fast drying one, and it left lots of brush marks. Even with a good brush. Can't wait to sand those doors again.
The kitchen is a mess- hardly usuable. Tonight it's left over lasagna I found in the freezer. Tomorrow when mom and dad arrive for a visit it will be take out pizza in the basement. And my cats seem to love paint. At least they have not gotten into the oil based primer (yet).

9.10.2008
Oops.
One hint when painting with kids around. Make sure that you keep all oil based paints and primers completely out of their reach. I had to prime one drawer front with oil as we sanded it and there was raw wood exposed.
How was I to know that my kids would try to make the box holding the used paint tray into a bug cage, and how was I to know that their neighborhood friend would get that primer all over her cute little face and hands. Thank goodness I have nice, understanding neighbors!
How was I to know that my kids would try to make the box holding the used paint tray into a bug cage, and how was I to know that their neighborhood friend would get that primer all over her cute little face and hands. Thank goodness I have nice, understanding neighbors!
9.09.2008
The Point of No Return........
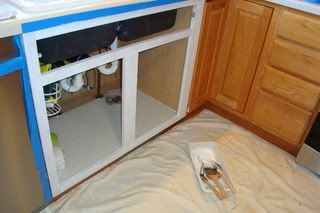
Today I started priming the cabinet under the sink- so, there is no going back now.
I bought some smaller brushes (Corona Cortez 2" and 1" and mini foam rollers) to make the job easier. So far, so good.
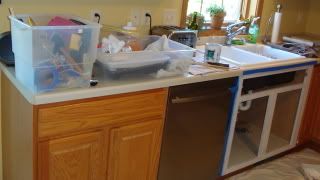
My kitchen is a disaster area. Pizza for a while, I guess! The kids will be happy.
I bought some smaller brushes (Corona Cortez 2" and 1" and mini foam rollers) to make the job easier. So far, so good.
My kitchen is a disaster area. Pizza for a while, I guess! The kids will be happy.

9.07.2008
Practice Door Finished, Now Ready to Paint!
So, I finished with a practice door. Primed two coats with PrepRite Bonding Primer by Sherwin Williams (latex!), and two coats of the Pro Classic Satin in Casa Blanca. Dave was a bit worried that the color is too light (even after making practice boards out of foam-core poster board and oak paneling). I think it was because it was a real door, and it looked SO DIFFERENT from the oak- stained doors up now. Linda came back over on an emergency color consult and agreed that the color was right. Dave agrees, too. Plus, the glazing techniques need to be perfected- too much looks terrible, and too little isn't enough. I'll get it figured out.
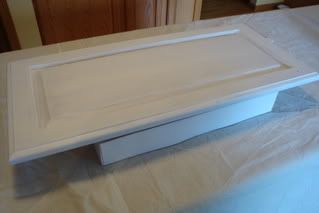
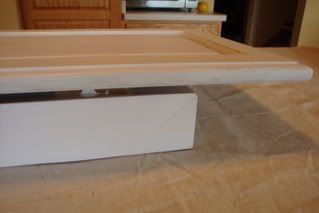
I found that raising the door on a shirtbox plus a wooden platform make of 2x2 inch squares of MDF allows for the edge of the doors to be painted most easily.
So, the technique I finally decided on is:
1. Wash with a mild degreaser, plus a final wash with ivory dishsoap, rinse well, and dry well.
2. Apply Liquid Sander
3. First coat of primer when the liquid sand is dry. Apply with a 4" foam roller or a Wooster Pro-Doo Z (I prefr these as they hold a bit more paint), back brush with a corona cortex or Excalibur (my favorite!) brush at a wide angle. Let dry 4 hours. Reprime. Dry 8 hours. Lightly sand/buff with 400 grit wet/dry sandpaper. Vacuum, and use a damp cloth as a tack cloth, and repeat a few times to remove ALL DUST!
4. Apply first coat of Pro Classic with same rollers (I will use a tiny one for the outside panel to avoid drips), back brush, let dry 8 hours. Lightly sand with 240 grit in a circular pattern, vacuum, tack cloth. Then apply final coat.
5. Mix 1 part paint (I forgot the color) with 4 parts latex glaze. Apply with a fine artists brush in the crevices of the door (or see our newest technique a few posts up). Wipe with paper towel to desired density.
6. Let the doors cure for 72 hours before re-hanging.
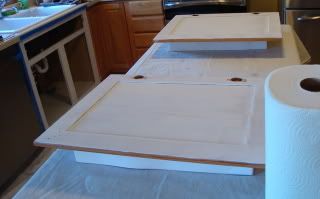
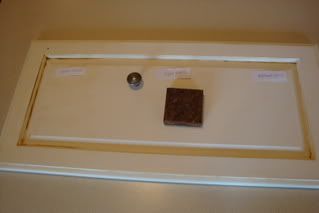
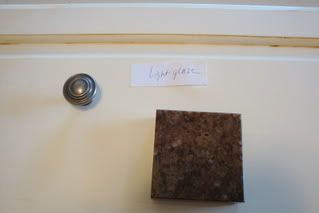
Here are pictures of my primer coat, my box/MDF setup, and the glaze choices on a finished door. Countertop sample and hardware are on the door to get a better idea of how it will all look together.
I found that raising the door on a shirtbox plus a wooden platform make of 2x2 inch squares of MDF allows for the edge of the doors to be painted most easily.
So, the technique I finally decided on is:
1. Wash with a mild degreaser, plus a final wash with ivory dishsoap, rinse well, and dry well.
2. Apply Liquid Sander
3. First coat of primer when the liquid sand is dry. Apply with a 4" foam roller or a Wooster Pro-Doo Z (I prefr these as they hold a bit more paint), back brush with a corona cortex or Excalibur (my favorite!) brush at a wide angle. Let dry 4 hours. Reprime. Dry 8 hours. Lightly sand/buff with 400 grit wet/dry sandpaper. Vacuum, and use a damp cloth as a tack cloth, and repeat a few times to remove ALL DUST!
4. Apply first coat of Pro Classic with same rollers (I will use a tiny one for the outside panel to avoid drips), back brush, let dry 8 hours. Lightly sand with 240 grit in a circular pattern, vacuum, tack cloth. Then apply final coat.
5. Mix 1 part paint (I forgot the color) with 4 parts latex glaze. Apply with a fine artists brush in the crevices of the door (or see our newest technique a few posts up). Wipe with paper towel to desired density.
6. Let the doors cure for 72 hours before re-hanging.
Here are pictures of my primer coat, my box/MDF setup, and the glaze choices on a finished door. Countertop sample and hardware are on the door to get a better idea of how it will all look together.

9.04.2008
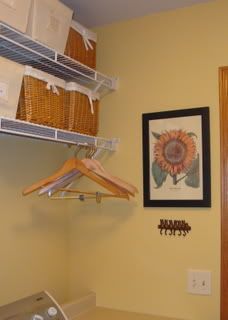
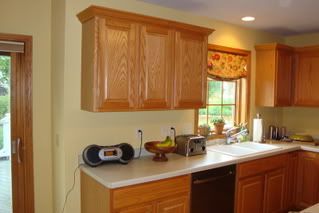
Painted the Kitchen Walls!
OK, we are making progress. The next step before moving cabinets and painting them was to paint the walls. It looks great- Humble gold was the perfect sunny color without being too yellow.
I will start painting cabinets tomorrow- or early next week. Probably early next week. I am feeling a bit nervous about it. Even though I know it is want we want, it will be such a big change. But, since we have wanted to change the cabinets since day one of moving here, I can't imagine it will be a mistake.
Here is the new wall color in the kitchen and laundry room. Pretty, isn't it?!


Subscribe to:
Posts (Atom)